
That's Great news Jeremy! It's funny...After what I had read I was hoping that it was something like a "Dirty" jack. Anyway I will keep you posted after I do a good cleaning on them & hopefully it will solve the problem. I still can not believe how great the Chorus sounds on this Amp! The Distortion is so BRUTAL yet the Clean is so "Crisp & Clear". It's One Hell of a Amp for sure. Anything from Killer Death Metal to Super Sounding Chorus! Thanks again Buddy take care & I will be in touch.. :tu:
- Welcome to Solid State Guitar Amp Forum | DIY Guitar Amplifiers.
Solid State Guitar Amp Forum
News:
30% off all Honey Amp kits, check it out at https://store.ssguitar.com !
This section allows you to view all posts made by this member. Note that you can only see posts made in areas you currently have access to.
Pages1
#2
Amplifier Discussion / Re: AMPEG VH140C "DRY" SIDE QUESTION?
May 13, 2014, 08:17:47 PM
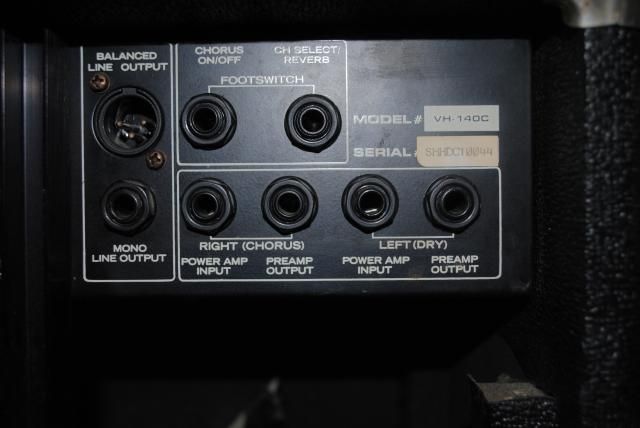
O.K. Jeremy...I just ran a Patch Cord from the "Dry" Preamp "Output" into the "Dry" Poweramp "Input" like you said to try & now YES I have all of my Power/Sound back coming out of my Cab that's being plugged into one of the "Dry" Speaker Outputs. I then plugged my other Cab into the "Chorus" side (Like I have been wanting to do) & O.M.G. it sounds Incredible! :dbtu: The Chorus on this Amp is Amazing Dude! I didn't realize how good of a Clean Channel this Head also has. All of it's glory being for the UN-GODLY amount of Distortion that it's very well known for! So now # (1)...What was the issue I was having? #(2)...Can I leave the Amp with the Patch cord in it like this & keep using my Amp this way w/o hurting anything? (Man I sure hope so because it sounds Insane! LOL!) Either way please let me know. Thanks again Buddy :cheesy:
#3
Amplifier Discussion / Re: AMPEG VH140C "DRY" SIDE QUESTION?
May 13, 2014, 08:02:13 PM
Jeremy hey Buddy it's Steve with the Randall RG100ES Heads? Hope ya remember? (It's been awhile since I have been on. I sent you a message the other day?) How you doing? Hope all is well with you & yours. O.K. I will give this a try & get back with you..I made a mistake on my previous post. I can hear some sound coming from the "Dry" Speaker Outputs when the volume is around 1-1/2-2. NOT around 5-6. Just wanted to clarify that. As always Thank Buddy! :tu:
#4
Amplifier Discussion / AMPEG VH140C "DRY" SIDE QUESTION?
May 13, 2014, 03:36:22 PM
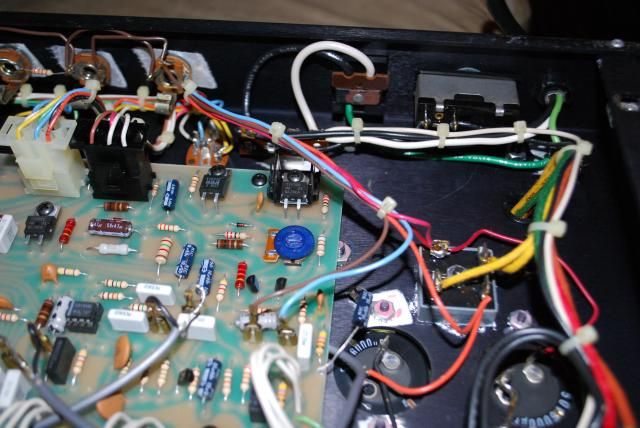
I have a question concerning the "Dry" side of the Speaker Outputs on my VH140C Solid State Head. At the moment I have my (2) 4x12 Randall 8 Ohm Cabs plugged into both of the "Chorus" Outputs (Both going to the "Input" on both of my Cabs) & all I can say is....It sounds KILLER! I unplugged both of them from the "Chorus" side & wanted to hear how the "Dry" side sounded. When I plug into either of the (2) "Dry" side Speaker Outputs I am only getting a VERY SMALL AMOUNT OF SOUND (with my Axe on 10 & the Level knob past 5-6? ) I have read in various Forums Etc that the VH140C has had some issues over the years with "Cold or Cracked" Soldered joints Etc in certain areas. I know at the moment I am using only 70 Watts & it is plenty L-O-U-D on 2...It Cranks! Still it would be great to be able to use the FULL 140 & get all of the Power/Sound. Anyway if any of you might have a solution as to why it's doing this I sure would appreciate it! Possibly an issue with the Right side Amp? Thanks! Steve \m/
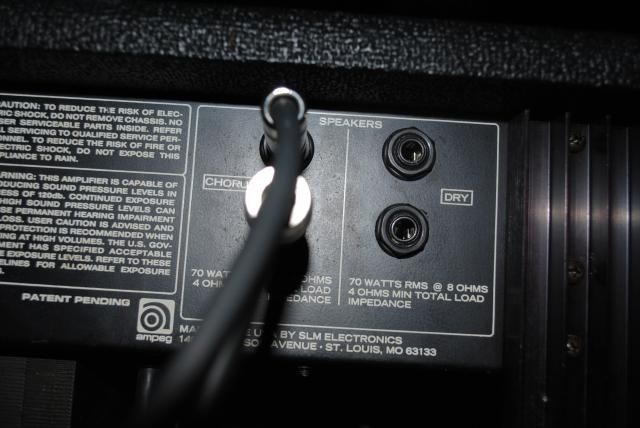
****PIC OF THE RIGHT SIDE****

****PIC OF THE RIGHT SIDE****

#5
Amplifier Discussion / NEW (OLD) AMPEG AMP DAY!!!
May 10, 2014, 04:56:44 PM
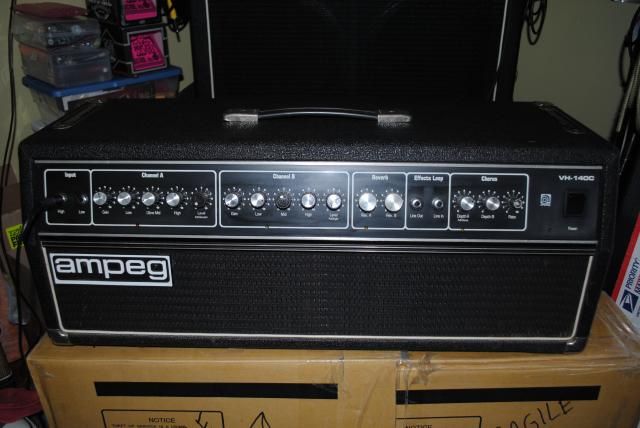
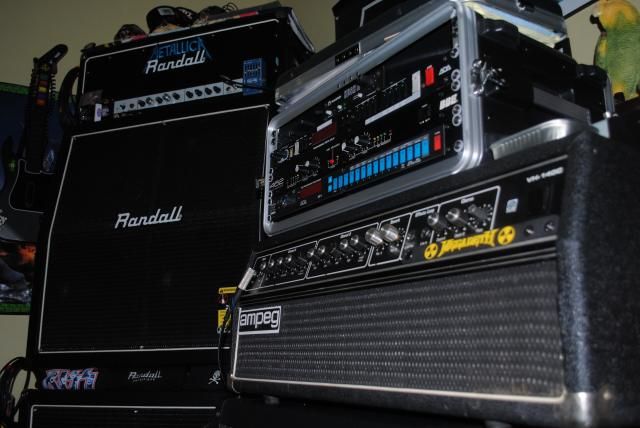
Hey Dudes hows it going? I have not been on for awhile (Due to my Health issues Etc) but I wanted to get on & tell you all about my newest addition to my "SOLID STATE WALL OF DOOM"!  The Dude I got it from (Dennis) was Super Cool & packed it so good it probably could have fell from 20 + feet & it still would have been working! Well after wanting & waiting for one of these Bad-Boys for a loooooooong time I FINALLY was able to get a AMPEG VH140C! I am a Old School Solid State Dude & I have some Randall RG100ES' Heads & some Randall 4x12 (Jaguar Loaded) Cabs along with a ADA 3.666 "Recto" Modded MP-1 Etc. All I can say about this Head is EVERYTHING that I have ever read & heard about or the videos that I have seen are all TRUE. The Gain alone is AWESOME on 4-5 & (To me anyway) this Head for sure does not need any Pedal Etc to help BOOST it! This is ONE B-R-U-T-A-L BEAST! Anyone interested in one or if you ever wanted to try it out & you have a chance to all I can say is GO FOR IT....IT'S KILLER! Thanks & LONG LIVE THE M-E-T-A-L! :dbtu:
The Dude I got it from (Dennis) was Super Cool & packed it so good it probably could have fell from 20 + feet & it still would have been working! Well after wanting & waiting for one of these Bad-Boys for a loooooooong time I FINALLY was able to get a AMPEG VH140C! I am a Old School Solid State Dude & I have some Randall RG100ES' Heads & some Randall 4x12 (Jaguar Loaded) Cabs along with a ADA 3.666 "Recto" Modded MP-1 Etc. All I can say about this Head is EVERYTHING that I have ever read & heard about or the videos that I have seen are all TRUE. The Gain alone is AWESOME on 4-5 & (To me anyway) this Head for sure does not need any Pedal Etc to help BOOST it! This is ONE B-R-U-T-A-L BEAST! Anyone interested in one or if you ever wanted to try it out & you have a chance to all I can say is GO FOR IT....IT'S KILLER! Thanks & LONG LIVE THE M-E-T-A-L! :dbtu: 

#6
The Newcomer's Forum / Re: RANDALL RG100ES BOARD?
January 07, 2014, 09:02:46 PMQuote from: JHow on January 07, 2014, 07:25:21 PM
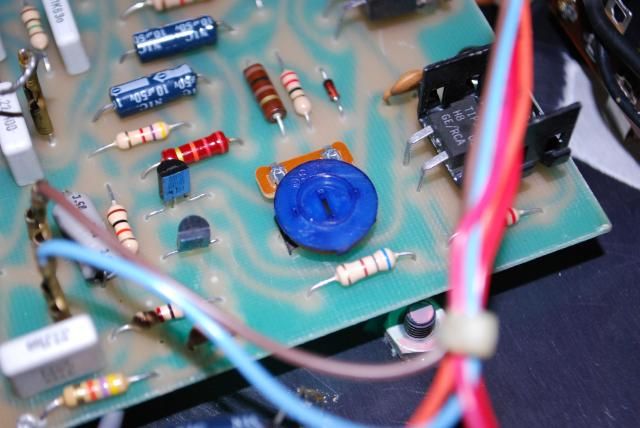
Bias adjustment - don't fool with it. See attached.
Thanks man...Just wondering what it was. \m/
#7
The Newcomer's Forum / Re: RANDALL RG100ES BOARD?
January 07, 2014, 11:40:01 AM
No there's nothing wrong with my Amp at all I had it out & was just wondering what this was for? Of course I would NEVER adjust or mess with anything internal on it! \m/
#8
The Newcomer's Forum / RANDALL RG100ES BOARD?
January 07, 2014, 09:52:05 AM
Hey guys hows it going? It's been awhile since I have been on. Can anyone out there tell me what this Blue Wheel does? I am sure many of you guys probably already know what it is anyway? LOL! I believe it's an adjustment for something? Any info would be great! Thanks \m/


#9
The Newcomer's Forum / Re: NEWBIE WITH A QUESTION ABOUT A RANDALL RG100ES??
February 12, 2013, 09:15:35 PMQuote from: g1 on February 12, 2013, 08:48:35 PM
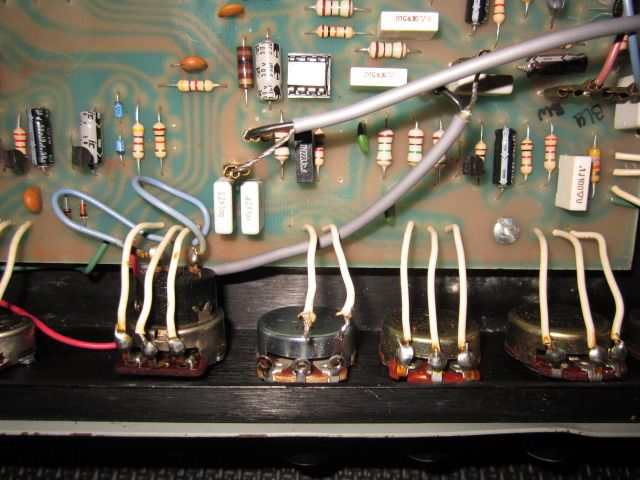
It is not necessary to desolder the wires from all the pots. You can remove the knobs and the nuts holding the pots to the chassis. Then push the pots into the amp. If you are careful you will be able to flip the board without breaking more wires.
If the wire is solid core, you may want to use stranded wire for replacement as it will probably take more flexing before it breaks.
Yeah i am with ya! The only problem I see doing it this way (Which is a great idea) is I think the wires (most or maybe all) are going to be very "Temperamental" as far as them "holding" on to the pot's etc when the board is removed. I would like to just take it out & take off all of the white wires to the pots & replace all of them with some new longer wires so this will not be an issue down the road! The board in the other pic up top looks like it would hold much better because the wires are run 'under & over" for strength. Thanks for your input! I appreciate it! \m/
#10
The Newcomer's Forum / Re: NEWBIE WITH A QUESTION ABOUT A RANDALL RG100ES??
February 12, 2013, 12:36:53 AMQuote from: g1 on February 11, 2013, 11:16:56 AM
Looks to be very straightforward as far as where the wires go.
If you haven't done something like this before, the trick will be to get the board loose so you can turn it over to solder the wire back to it.
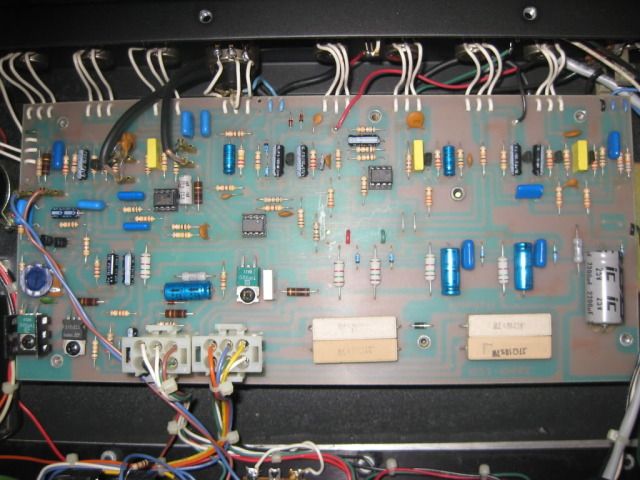
I like the way that the wires from the pots are run "Under & Over" on this Board. Im sure they are much Stronger this way! They are just on top on my Board straight from the pot. Which to me seems like a "Weak" link..
#11
The Newcomer's Forum / Re: NEWBIE WITH A QUESTION ABOUT A RANDALL RG100ES??
February 11, 2013, 11:22:38 PMQuote from: DrGonz78 on February 11, 2013, 06:23:20 PM
Yeah actually I did work on an RG80 before and removing all the pots was the way to go for me. Sometimes other wires can come loose while getting to the underside of the board to do the soldering. Double check all other wires before putting it all back together or you could end up repeating this if you notice a loose wire later. When you don't free up the pots the three wires to the board can get loosened. I also found it much easier soldering on the board with it freed up. I actually replaced all the wires that were on all the pots as the wire was old and needed it. The older wiring in these amps tends to break off at the board pretty easy. Good luck :tu:
Edit: I was posting just as you were and was mentioning the old wires on the pots... Either way you go about this those wires may break off...
Yeah the only way to do it....Is EXACTLY the way you described it! The wires seem to be very frail after all these years. Wish back in the day they did the routing of the wires a little different etc? I mean c'mon 25+ years I think they did (& still are) doing a great job! Removing the board & "De-soldering" all the wires from the pots is the only way to go about this. I was looking @ it today & realized that this was the only way for it to be fixed properly...Thanks for the reply!
#12
The Newcomer's Forum / Re: NEWBIE WITH A QUESTION ABOUT A RANDALL RG100ES??
February 11, 2013, 06:04:52 PMQuote from: Enzo on February 11, 2013, 05:29:09 PM
That is what you have to do. A proper repair would not be to try to solder a wire to some little scap sticking out from the board. You turn the board over, or at least free it enough to get at the underside, clear any remaing bits of wire and old solder from the hole where the wire goes. Trim off some insulation from th wire to expose the conductor, put the conductor through the hole, and solder it to the board.
Nah I would NEVER repair something like that ever! Im sure alot of people would try to get away with soldering a little piece of wire to the "Non-Exisiting" piece of wire that's not even there! LOL! Anyway I figured the proper way to fix this was to remove the board & solder it from the other side. I wanted to see if you guys the "Pros" had any other ideas to run by me or let me try etc??? I appreciate your Help Guys! Here is a pic of the issue...
#13
The Newcomer's Forum / Re: NEWBIE WITH A QUESTION ABOUT A RANDALL RG100ES??
February 11, 2013, 01:08:38 PMQuote from: g1 on February 11, 2013, 11:16:56 AM
Looks to be very straightforward as far as where the wires go.
If you haven't done something like this before, the trick will be to get the board loose so you can turn it over to solder the wire back to it.
No there is no issue where the wire goes..It's getting it back on. It broke off right @ the board. There is really nothing coming out of the board to grab on to...No I have not had the Board out before...Thanks!
#14
The Newcomer's Forum / NEWBIE WITH A QUESTION ABOUT A RANDALL RG100ES??
February 11, 2013, 06:03:45 AM
Hey Guys hows it going? I just found this site & it's Awesome! It looks like the place to be if your in to S/S Amps LOL! Anyway I have a question...I FINALLY found a RG100ES! I have been wanting one for awhile because these To me are one of if not the BEST S/S Amps period & I play Metal so it's a "No-Brainer"! I needed to replace a pot (for my Mids) no problem I got the pot from Mouser took the amp apart & realized that one of the three wires that go to the pot has come off @ the board. Everything else looks perfect on the Amp. It has been taken care of very well since the 80's! What can I do to fix this? I can provide a pic if you need one. Thanks again for any help Steve.
Pages1